

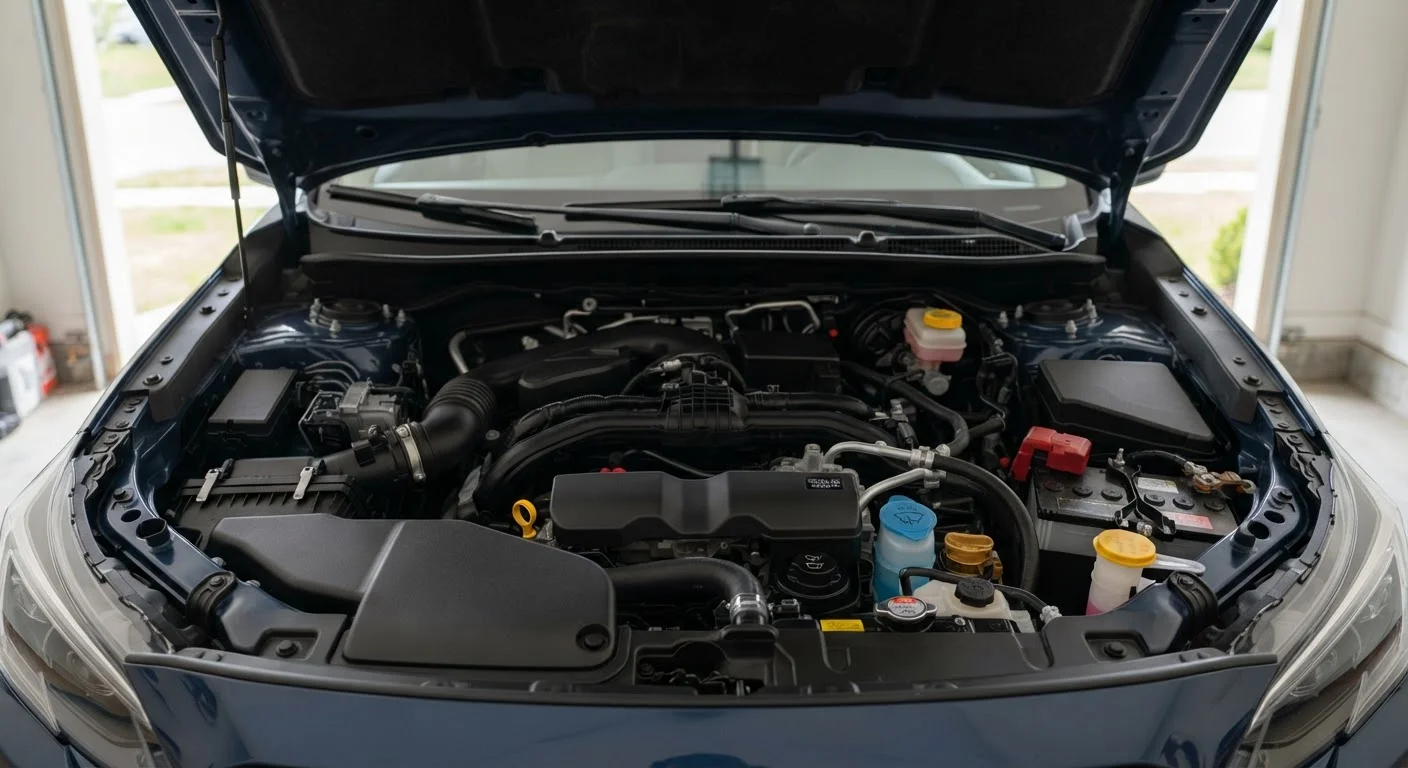
Why Fluid Checks Are Worth Five Minutes of Your Time
Most vehicle breakdowns and a significant share of costly repairs trace back to one root cause: a fluid that was low, contaminated, or completely ignored. Engine oil lubricates hundreds of moving parts. Coolant prevents overheating. Brake fluid transmits the force that stops your vehicle. None of these systems send an obvious alert until a problem is already developing.
The good news is that checking these fluids doesn't require mechanical training - it requires about 15 minutes, decent lighting, and your owner's manual. If you're new to vehicle ownership, the first-year ownership guide covers this and several other fundamentals worth knowing early. And if you want to understand which maintenance tasks often fall through the cracks, see our look at routinely skipped maintenance.
Owner's Manual
Identifies the correct fluid types, reservoir locations, and acceptable level ranges specific to your vehicle.
Lint-Free Rags or Paper Towels
Used to wipe dipsticks clean before taking an accurate reading.
Flashlight or Headlamp
Improves visibility when inspecting reservoirs in a crowded or shaded engine bay.
Nitrile Gloves
Protects skin from brake fluid and other chemicals that can irritate or stain.
Funnel
Helps add fluid to narrow reservoir openings without spilling onto engine components.
How to Check Six Essential Fluids
Work through these checks in order with the engine off (unless otherwise specified in a step) and the vehicle on level ground. Each fluid has a dedicated reservoir or dipstick - your owner's manual is the definitive reference if you can't locate one by sight.
What you will need
Check Engine Oil
Park on level ground and wait until the engine is either cold (before starting) or has sat for at least five minutes after being turned off. Locate the oil dipstick - typically a brightly colored ring or handle near the front or side of the engine. Pull it out, wipe it clean with a rag, reinsert it fully, then pull it out again. The oil level should fall between the two marks at the bottom of the dipstick. Also note the color: fresh oil is amber; dark brown or black oil is aged. Milky or frothy oil can indicate coolant contamination - a mechanic should evaluate this promptly.
Check Coolant (Antifreeze) Level
With the engine cold, locate the translucent plastic coolant reservoir - it's usually near the radiator and connected by a hose. Most reservoirs have MIN and MAX lines molded into the side; the coolant level should sit between them. Check the color: coolant is typically green, orange, or pink depending on the formula. Murky, rust-colored, or oily coolant signals it may need a flush. Do not add tap water as a long-term fix; use the coolant type specified in your owner's manual, pre-mixed or diluted to the ratio your climate requires.
Check Brake Fluid
The brake fluid reservoir is a small translucent plastic container on top of the brake master cylinder, located on the driver's side near the firewall at the back of the engine bay. Without removing the cap, look through the reservoir wall - the level should be between MIN and MAX. Brake fluid naturally darkens over time as it absorbs moisture; very dark fluid often benefits from a flush at a service interval. If the level is noticeably low, have your braking system inspected for leaks before simply topping it off - low brake fluid can indicate worn brake pads or a leak, not just evaporation.
Check Power Steering Fluid
Many newer vehicles use electric power steering and have no fluid reservoir at all - check your owner's manual first. If your vehicle has hydraulic power steering, the reservoir is typically labeled with a steering wheel icon and located on one side of the engine bay. Some use a dipstick attached to the cap; others have MIN/MAX lines on the reservoir body. Check the level when the fluid is at operating temperature (after a short drive) for the most accurate reading. Low power steering fluid that accompanies difficulty turning or a whining noise when steering warrants a leak inspection.
Check Transmission Fluid
Automatic transmissions typically have a dipstick (consult your manual for its location - often toward the rear of the engine bay), and the check is generally done with the engine warm and running, in Park. Some modern vehicles have sealed transmissions with no dipstick; those require dealer or shop equipment to inspect. Manual transmissions are checked differently and usually require removing a fill plug - a task better suited to a shop visit. For automatics, pull and wipe the dipstick, reinsert, and pull again. The fluid should be pinkish-red and translucent; dark brown or burnt-smelling fluid suggests it's overdue for service.
Check Windshield Washer Fluid
The windshield washer reservoir is the easiest fluid to check and the only one where running low poses no mechanical risk - though poor visibility is a safety concern. Find the reservoir (usually labeled with a windshield/wiper icon), and visually confirm it has sufficient fluid. Use a washer fluid formulated for your climate; plain water can freeze in cold weather and won't cut through road grime and bug residue as effectively. Do not substitute other household cleaning products, which can clog nozzles or damage paint.
Never Open a Hot Radiator Cap
Coolant systems operate under pressure. Opening the radiator cap or coolant reservoir cap on a hot engine can cause scalding fluid to eject suddenly. Always wait at least 30 minutes after driving before inspecting coolant levels. If you notice steam or a sweet burning smell, pull over safely and do not open the hood until the engine has fully cooled.
Keep a Simple Fluid Log in Your Glove Box
Jot down the date, mileage, and any fluid you topped off each time you check under the hood. If you find yourself repeatedly adding the same fluid, that pattern - rather than a one-time low level - is the signal to have a mechanic investigate for a leak or internal consumption issue.
Once you've run through these checks regularly, you'll also be well-prepared for longer trips. Our pre-road trip checklist builds on these basics and covers tires, lights, and other pre-departure items worth inspecting. For a broader view of when these checks fit into a seasonal rhythm, the seasonal maintenance guide is a useful companion. And if you're weighing which jobs to tackle yourself versus leaving to a professional, DIY vs. mechanic can help you draw that line confidently.
The content on this site is provided for informational purposes only and should not be considered a substitute for professional advice. While we strive to provide accurate and up-to-date information, we make no guarantees regarding its completeness or accuracy. Always consult a qualified professional for advice specific to your circumstances before making any decisions.